Yabasanshiro is an emulator that makes heavy use of modern GPUs to run Sega Saturn games at high resolution and high speed.
In a recent post I described how I rebuilt the VDP1 processor — the one that draws sprites and polygons — using compute shaders. This time the story is about the other video processor: VDP2, which handles backgrounds and translucency. I rebuilt its emulation from scratch.
The previous design, and its problems
Until now, Yabasanshiro emulated each of VDP2’s background layers (NBG0–3, RBG0) by “pasting textures onto polygons and drawing them.” This is the most common way to render graphics on a modern GPU.
Modern GPUs come with alpha blending, depth testing, and stencil testing built in. Using them, you can offload translucency and front-to-back ordering to dedicated hardware and run it very fast.
But the Saturn has several hardware-specific behaviors that simply can’t be reproduced with a modern GPU’s built-in features alone.
Too transparent — how it differs from ordinary alpha blending
A modern GPU’s alpha blending can stack any number of translucent images, one after another. The Saturn’s color calculation, on the other hand, normally operates between just two images — the frontmost pixel and the pixel of the next priority behind it.
If you ignore this difference and blend the way a modern GPU does by default, transparency that should stop after two layers ends up bleeding through many more, and you get a result that is too transparent.
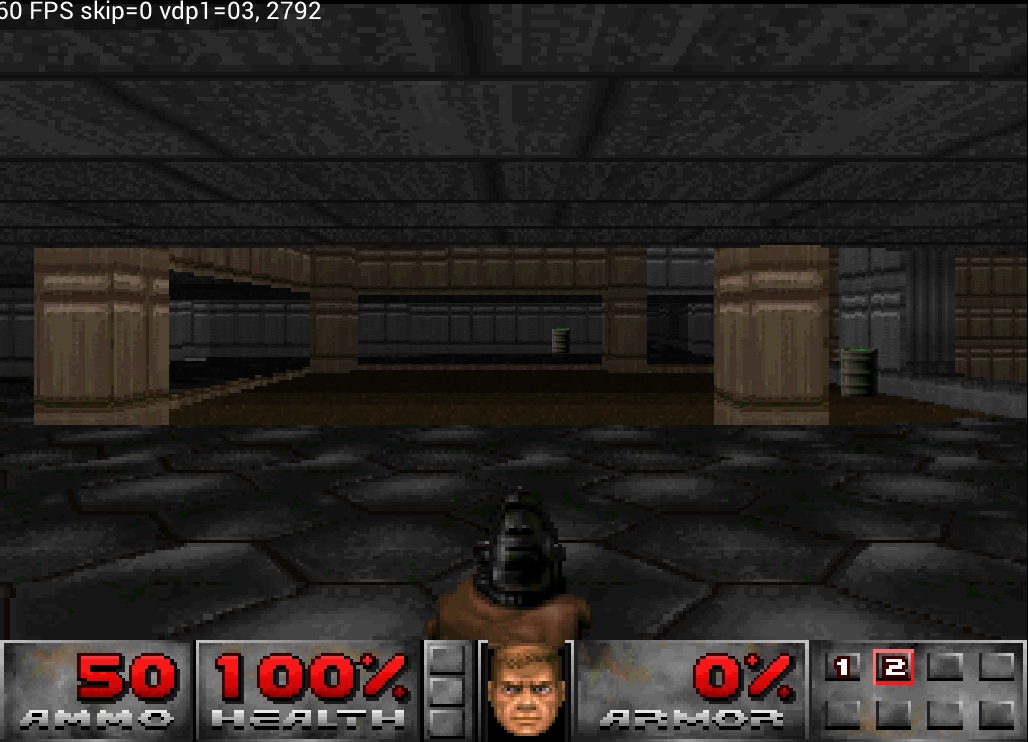
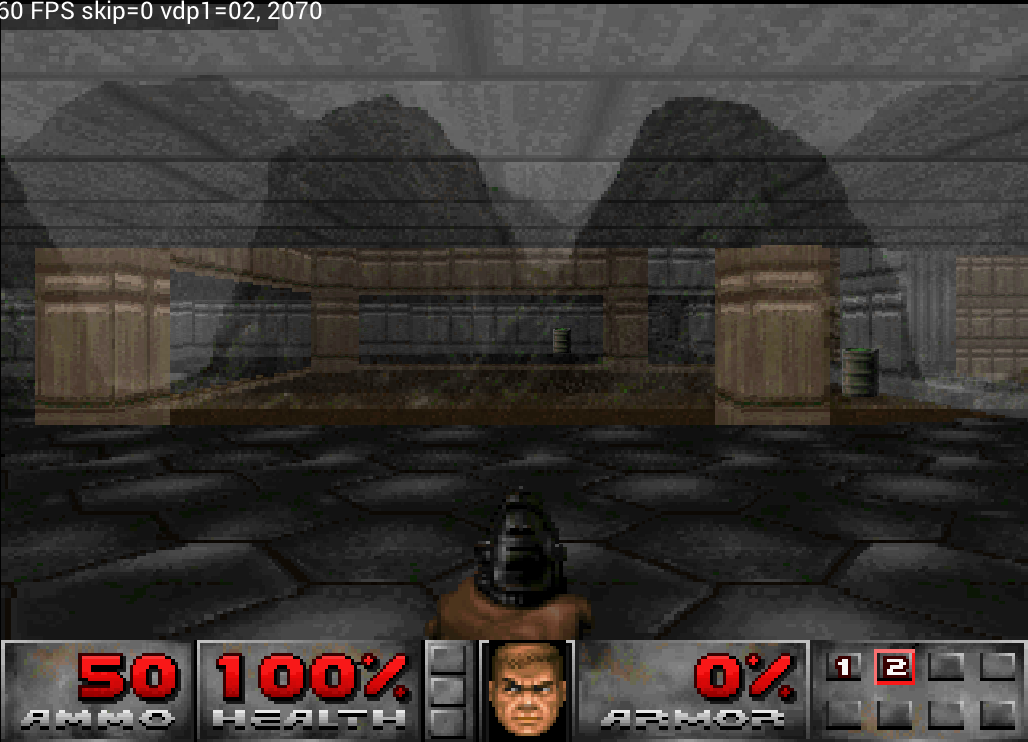
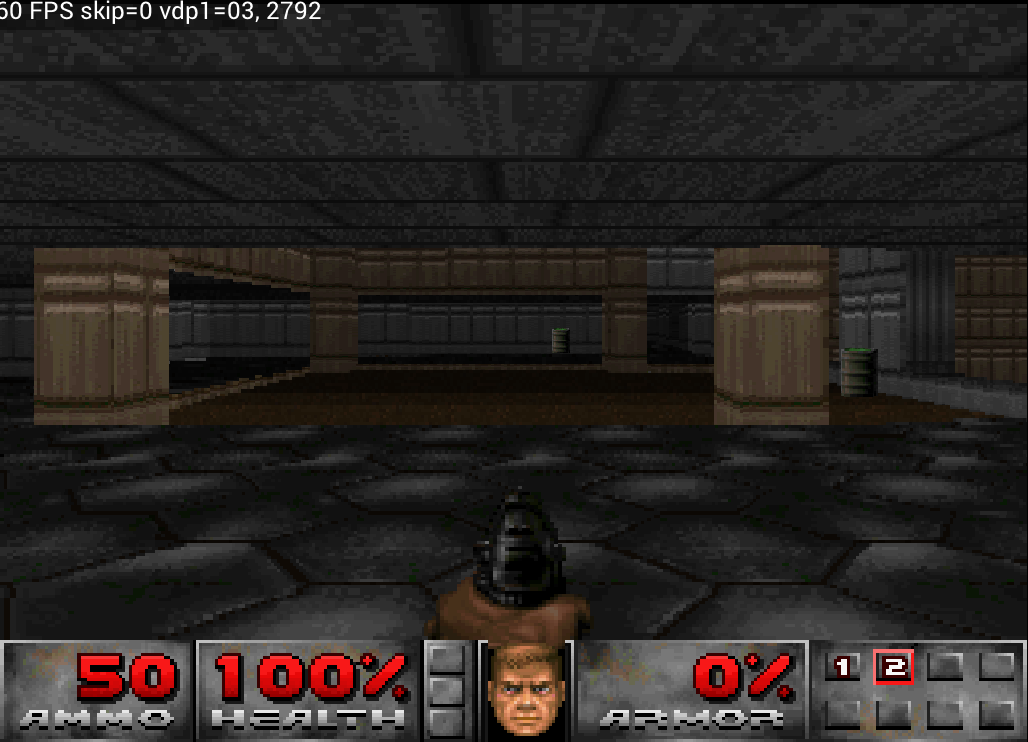
In Doom, for example, the translucency effect was too strong: you could see straight through the walls to the background behind them.
Destination alpha — not “the value already written,” but “the value of the next priority”
One feature used by games like Sakura Wars is destination alpha. It makes a pixel translucent using the settings of the pixel one priority below it.
To reproduce this, you have to reference “the value of the pixel beneath it” at draw time.
And here lies a fundamental mismatch with modern GPUs. The only thing a GPU’s blend can reference is the value already written to the framebuffer. VDP2, however, computes using the value of the next-priority image — not the value already written. That makes it hard to map directly onto the GPU model.
Per pixel, not per layer — special priority
If priority were decided per layer (per surface), there would still be ways to cope — you could just reorder the layers.
But VDP2 has a feature called special priority, in which priority changes per pixel. Even within a single layer, the front-to-back order can swap from one pixel to the next, so reordering whole layers isn’t enough.
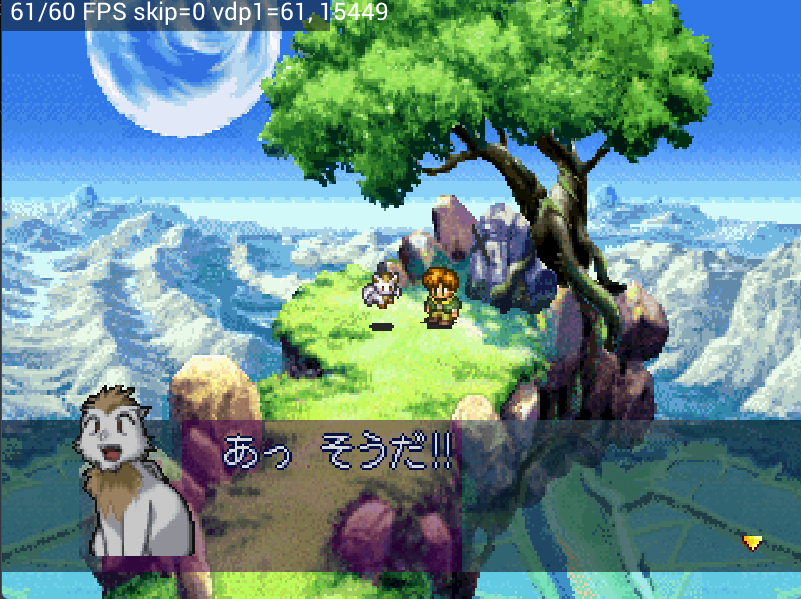
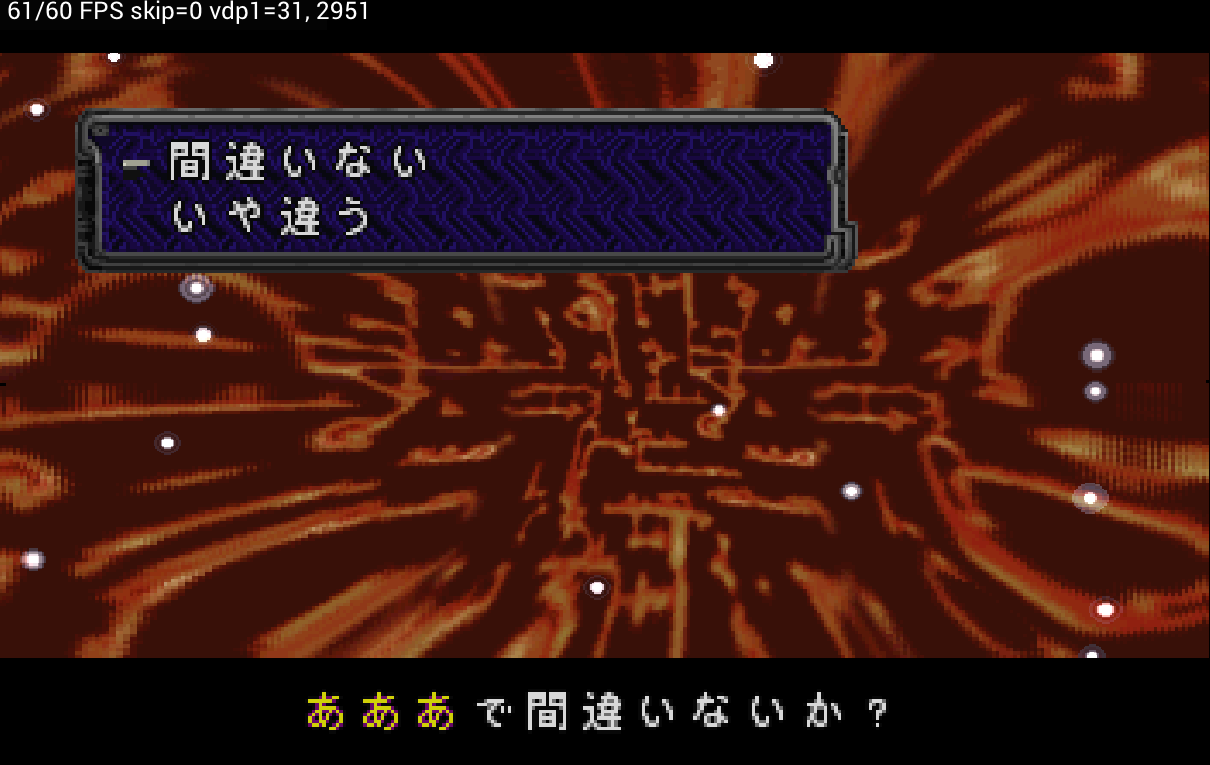
In Azel (Panzer Dragoon Saga), the menu background — which should be opaque — was rendered translucent.
Extended color calculation — using the 3rd and 4th priorities too
VDP2 also has an extended color calculation feature that composites color while considering not only the frontmost (Top) and second (Second) priorities, but also the 3rd and 4th.
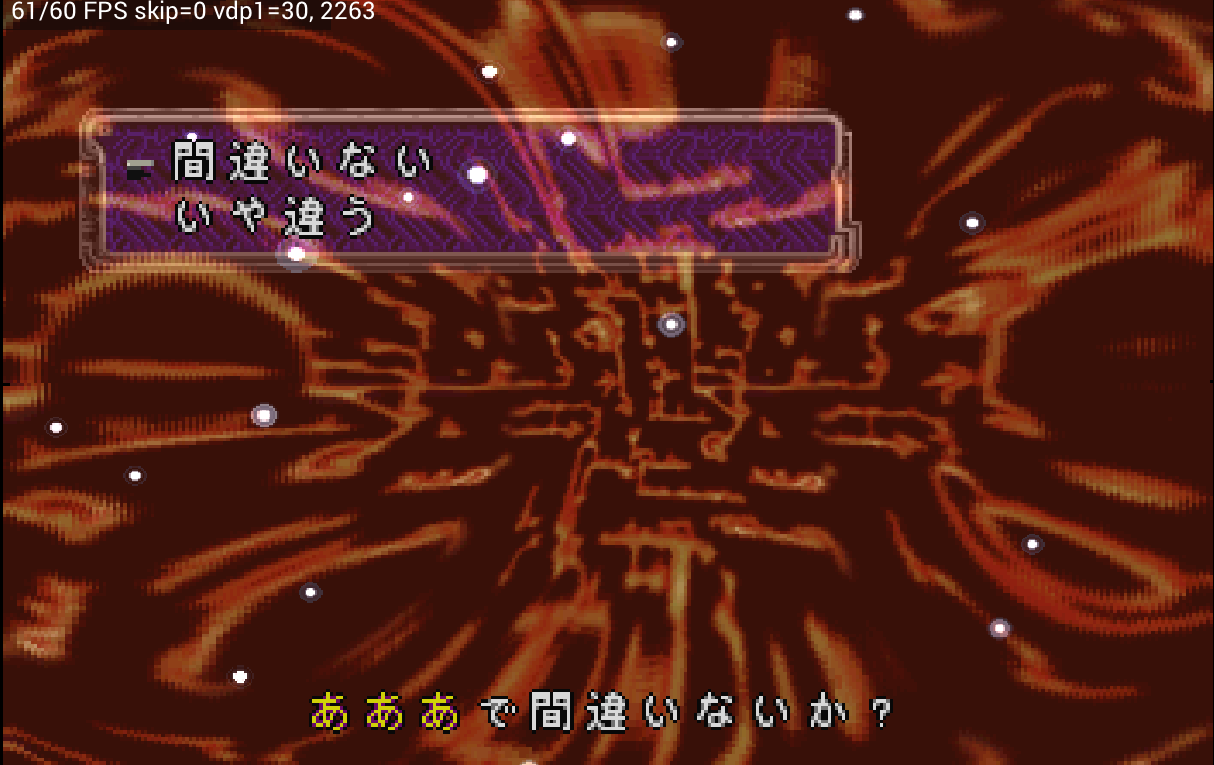
Whereas ordinary color calculation finishes with two images, extended color calculation folds together up to four images’ worth of color. In Luna’s message display, this wasn’t handled correctly, and the text area came out tinted purple.
Why does such a difference arise?
So why are VDP2 and modern GPUs so out of step in the first place? Because their processing runs in opposite directions.
A modern GPU’s rendering ultimately completes by writing color to memory (the framebuffer).
- Whether or not to write → depth/stencil testing
- How to decide the color when writing → alpha blending
And the only thing it can reference in the process is the value already written.
VDP2’s original role, by contrast, is to read memory and convert it into an analog video signal. As extensions to that role:
- Deciding where in memory to read from → priority
- Deciding how to combine the value it read with “pixels of other priorities” → color calculation
In other words, where the GPU processes in the “writing” direction, VDP2 processes in the “reading” direction. This opposite orientation was the root cause of what made VDP2 emulation so difficult.
“Modern” means something different in 2013 versus 2026
The “modern GPU” I’ve been describing is the GPU of around 2013, when I started building a Sega Saturn emulator for Android. Mobile GPUs of that era were optimized for painting triangles as fast as possible and were bad at anything like “reading back what you’ve already drawn.” That’s why mapping VDP2 straightforwardly onto polygon rendering — and patching the gaps with corrections — was the practical choice.
But things look very different in 2026.
Multiple render targets (MRT) and G-buffers — mechanisms that write out many layers’ worth of information at once and let you read them back freely afterward — have become a given even on mobile devices.
With that as a foundation, it’s entirely feasible to design VDP2’s “reading-direction” processing honestly, without relying on forced corrections. So this time I rebuilt VDP2 from the ground up.
The new design — compositing per pixel via scanline processing
The new VDP2 emulation is based on scanline processing, so that operations happen in an order as close to the real hardware as possible.
The work splits into two main stages.
1. Decode each layer into a “G-buffer”
First, each layer (NBG0–3, RBG0, and the sprite layer) is rendered individually into its own dedicated buffer (slice). No compositing (color calculation) happens at this stage. For each pixel, we only record the color plus attributes such as priority, whether color calculation is enabled, the calculation ratio, and whether the pixel is transparent.
2. Composite per pixel
Next, the whole screen is processed in a single shader. For each pixel:
- Read all the layers, sort them by priority (high to low, 7→1), and identify the frontmost, second, third, and fourth pixels.
- Run color calculation on the identified pixels, in the same order as the real hardware.
- Apply line color and color offset to finalize the output color.
That sequence determines the final color.
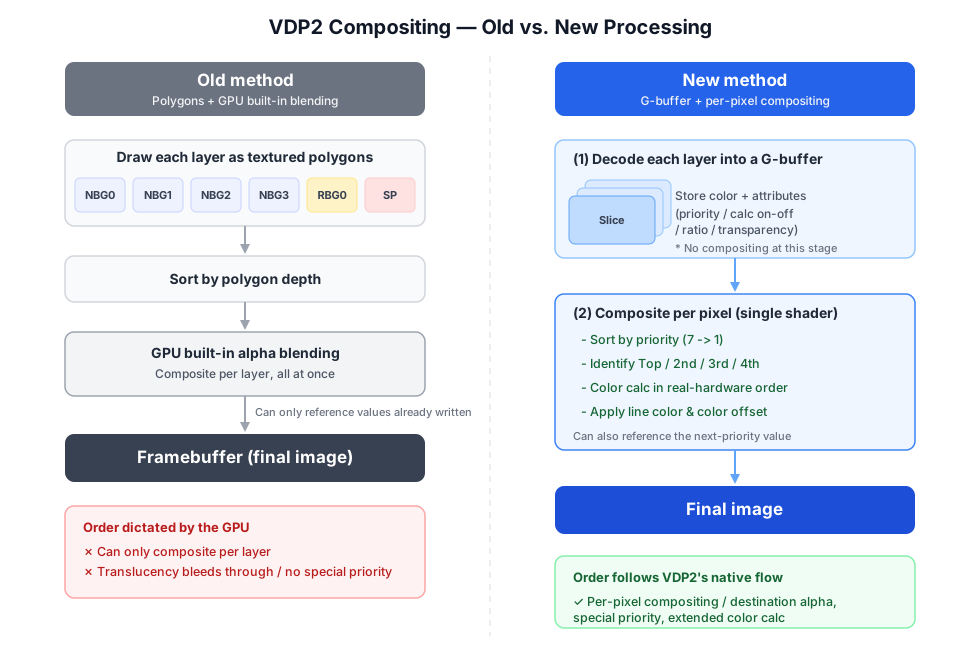
The key point is that the order of operations now matches the real hardware.
The old method followed a GPU-friendly order: “sort by polygon depth, then compute color per layer.” The new method follows VDP2’s native flow: “read every layer per pixel, sort by priority, then run color calculation in real-hardware order.”
As a result, processing that we previously had to fake with corrections can now be implemented honestly with its proper logic. With this rebuild, the core color-calculation and compositing features of VDP2 are now largely complete (roughly 90%).
| Feature | Status |
|---|---|
| Layer compositing / priority (per pixel) | ✅ Implemented |
| Normal color calc (ratio / add, CCRTMD) | ✅ Implemented |
| Destination alpha | ✅ Implemented |
| Extended color calc (3rd / 4th) | ✅ Implemented |
| Line color (LNCL) | ✅ Implemented |
| Special priority (per-character / per-dot) | ✅ Implemented |
| Special color calc (SFCCMD / palette color) | ✅ Implemented |
| Color offset / per-scanline setting tracking | ✅ Implemented |
| CRAM 3 modes / layer display window | ✅ Implemented |
| Color gradation / hi-res CRAM special handling | ✅ Implemented |
| Sprite / MSB shadow | △ Compositing logic done; attribute wiring under verification |
| Special color calc (RGB direct color) | ⬜ Not yet supported |
| Color calc window / mosaic | ⬜ Not yet supported |
Test results
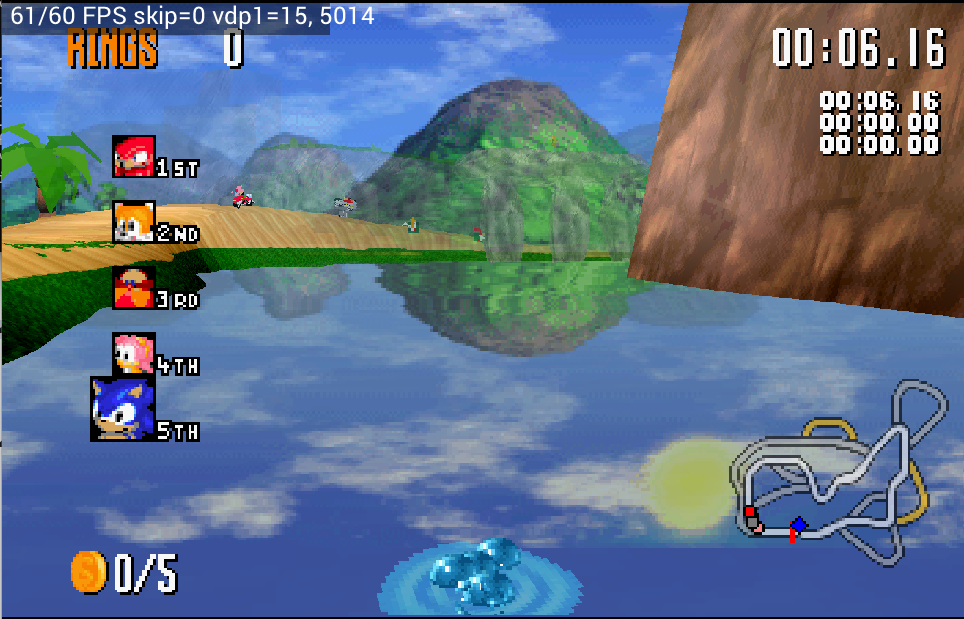
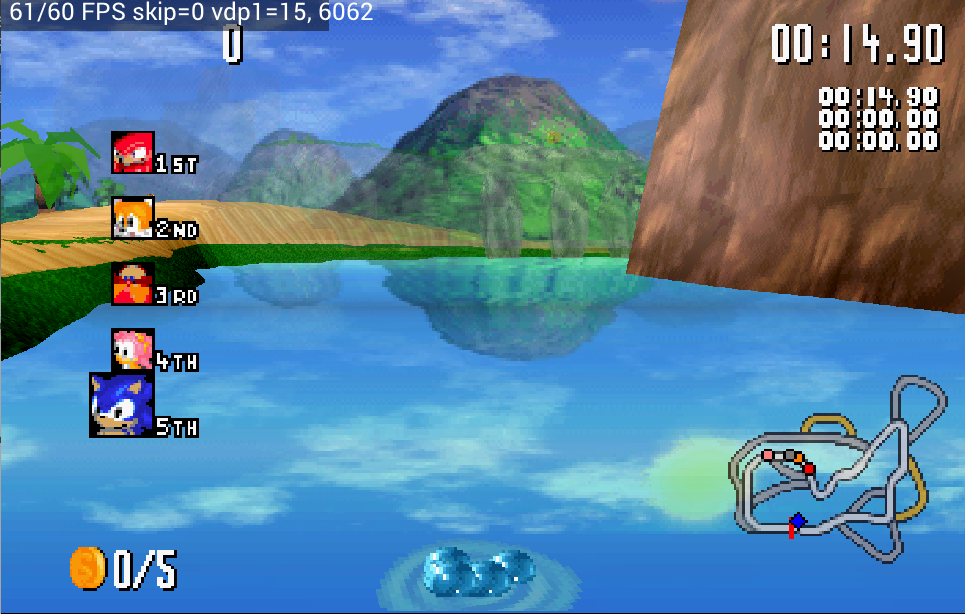
With the new method, the following long-standing problems have been resolved or improved. In each image, the left is before the fix and the right is after.
Doom — fixed walls being too transparent
Resolved the problem where translucency was so strong that you could see through the walls to the background behind them.
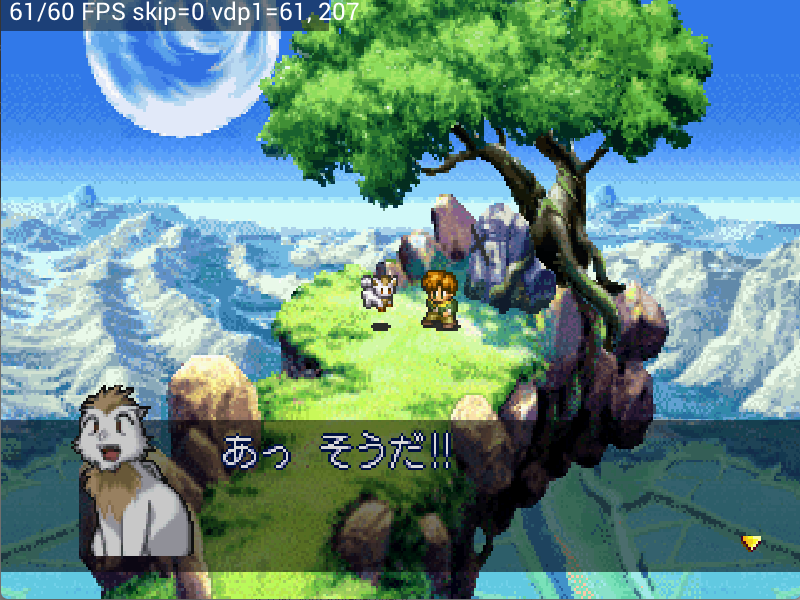
Luna — fixed the purple tint on text
Addressed the problem where text in the message area came out tinted purple. By running extended color calculation in the correct order, the colors are back to normal.
Azel — fixed the translucent menu background
Resolved the problem where the menu background, which should be opaque, was rendered translucent — thanks to being able to handle special priority correctly on a per-pixel basis.
Sonic R — fixed the ocean blending
Addressed the problem where the blending of the ocean surface was incorrect.
Performance measurement
Per-pixel compositing carries a heavier load than the straightforward, per-layer approach. So I compared the frame rates of the old and new methods on real hardware.
Test conditions
- Device: AYN Thor
- Game: Sonic R (from launch through the end of the demo)
- X axis: elapsed time (seconds) / Y axis: frames rendered per second
- To reveal the difference in processing cost, the frame limit (60 fps cap) was removed for the measurement
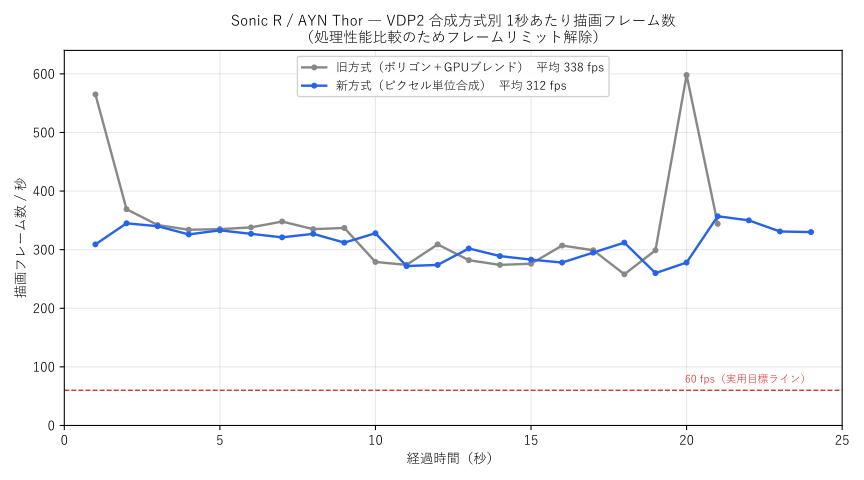
The result: both methods ran far above 60 fps (roughly 260–350 fps), and the two curves nearly overlap. The new method’s overhead averaged about 8% (around 5% on a median basis, excluding spikes), and at the heaviest moment (minimum fps) the two were nearly identical — 258 fps for the old method and 260 fps for the new.
The big spikes for the old method early in the graph (around the 1-second mark) and near the 20-second mark occur on load and scene-transition screens, where there are few layers and rendering is light — they are not the load of actual gameplay.
| Compositing method | Avg fps | Min fps | Holds 60 fps |
|---|---|---|---|
| New method (per-pixel compositing) | 312 | 260 | ○ (always above 60 fps) |
| Old method (polygons + GPU blending) | 338 | 258 | ○ (always above 60 fps) |
The new method adds only a slight overhead over the old one, and I confirmed there is ample headroom to hold 60 fps on the AYN Thor. In performance terms, it meets the new method’s goal of combining accuracy (color calculation just like the real hardware) with practical performance on Android (holding 60 fps).
Note: In normal play with the frame limit enabled, both methods sit at 60 fps, so there is no perceptible difference. This measurement removed the cap specifically to compare processing headroom.
Summary
This VDP2 rebuild is a major step toward bringing Yabasanshiro’s graphics closer to the real hardware.
VDP2 and modern GPUs were, from the start, oriented in opposite directions. Where the GPU works in the “writing” direction, VDP2 works in the “read-and-composite” direction. On the mobile GPUs of 2013 it was hard to bridge that gap, and there was little choice but to rely on corrections.
Now, in 2026, with features like MRT and G-buffers available as a matter of course even on mobile, it has become possible to reproduce VDP2’s native “read-and-composite” processing per pixel, in the same order as the real hardware.
Yabasanshiro will keep harnessing modern GPU features as development continues, aiming for an environment where you can enjoy Sega Saturn games more beautifully and more accurately than ever.